Passbolt - an open source password manager
- NeuroForge
- Jun 12, 2019
- 7 min read
At NeuroForge, like in any other company, we have many different passwords for various services that need to be shared internally within the team. Therefore, we have decided to use a team password manager for managing these passwords. Additionally, a requirement was that the data should, if possible, be stored on our own servers.
In the end, we chose the open-source solution Passbolt. One major advantage here is the use of standard technology: Passbolt utilizes the OpenPGP encryption standard to encrypt the passwords, which are then stored only in their encrypted form in a MySQL/MariaDB database.
Passbolt is used through a browser plugin (for Google Chrome, for Mozilla Firefox). This plugin serves for securely encrypting and decrypting the passwords, as the PGP key of each user is stored there and is mostly protected from unauthorized access due to the containerization of the plugins in modern browsers. For additional security, Passbolt enforces the assignment of a passphrase for the key when creating new accounts, ensuring that the key alone does not grant access to the system. Mobile applications for Android and iOS are announced for Q3 2019.
Installation of Passbolt
The installation of Passbolt is not complicated but still requires some manual steps that can be performed faster with automation (e.g., system updates). At NeuroForge, we use Ansible for this purpose. Ansible is a tool for IT automation developed by RedHat that allows us to define desired configurations of servers. The Ansible runtime takes care of setting up the desired configuration on the server.
To install Passbolt with Ansible, we have created Ansible scripts at NeuroForge, which we have published on our GitHub at
In the following, we describe how these scripts can be used to set up a secure Passbolt installation.
Prerequisites
Server
In the following, it is assumed that the server is set up on a newly provisioned (virtual) Ubuntu 18.04 LTS server with a public IP. This server should also have an SSH key set up for root access – we need this to automatically set up the server with Ansible.*
Furthermore, the server should be reachable via a domain. Free domains can be obtained, for example, from DuckDNS.
Local
On the local machine from which the server is to be set up, the following software is required:
Ubuntu 16.04/18.04 or another modern Linux distribution (should also work with Windows, but not yet tested)
Installed and configured Ansible, using the following commands:
1.    sudo apt install python3
2.    sudo apt install python3-pip
3.    pip3 install ansible==2.7.10
4.    ansible-galaxy install geerlingguy.docker,v2.5.1
      geerlingguy.mysql,v2.9.4
Configuration of the Ansible scripts: Before we can use the Ansible scripts, we need to download them and configure them.
First, we download the scripts, extract the zip archive, and navigate to the repository:
1.    wget
      https://github.com/neuroforgede/passbolt_ansible/archive/master.zip
2.    unzip master.zip
3.    cd passbolt_ansible-master/
Now we need to modify the security-related files.
WARNING: This step is crucial and should not be skipped. In the published repository, all security-related passwords are preconfigured with example passwords. These passwords must be changed without fail; otherwise, the resulting installation will use the default settings visible in the GitHub repository.
Inserting the root SSH keys
To use the playbook, the root SSH keys for the server need to be placed in the ssh_keys subfolder. Simply copy the private key to ssh_keys/root_rsa and the public key to ssh_keys/root_rsa.pub.
Customizing SSL certificates for the database server
The Ansible scripts use self-signed SSL certificates to configure SSL communication between the Passbolt server and the MariaDB instance. While not strictly necessary since both programs will run on the same host, it is a good security measure if the Passbolt server is to be separated from the database in the future.
Firstly, the scripts for generating the SSL certificates need to be customized. In our case, they are located under passbolt_ansible-master/files/certs/passbolt_server. In the files/certs/passbolt_server/gen_root_cert.sh and files/certs/passbolt_server/gen_server_cert.sh files, the lines for SSL certificate issuance need to be adjusted to match your own organization. The relevant lines can be found by searching for "emailAddress=test@your-domain.de". The configuration options to be set are self-explanatory.
Next, the passwords and IPs in files/certs/passbolt_server/recreate_server_certs.sh should be replaced with the placeholders <your-root-ca-password>, <your-server-ip>, <your-passbolt-ssl-password>, and <your-mariadb-ssl-password>. Once these steps are completed, the certificates can be generated.
1.    cd passbolt_ansible-master/files/certs/passbolt_server
2.    bash recreate_server_certs.sh
Configuring Passbolt settings
The configuration for the Passbolt server is located in inventories/passbolt/group_vars/all/all_config.yml The following settings need to be changed at a minimum:
1.    # the main domain of your infrastructure (passbolt is never hosted
      on the root domain with this playbook)
2.    infrastructure_base_domain: "neuroforge-test.duckdns.org"
3.    # the actual domain to use for passbolt, only change the part before
      the first dot
4.    passbolt_domain: "vault.{{ infrastructure_base_domain }}"
5.    # which passbolt version to use, see
      https://hub.docker.com/r/passbolt/passbolt/tags
6.    passbolt_version: "2.10.0-debian"
7-    # the password to the passbolt database
8.    passbolt_db_passwd: "UJ2nsUjgCgQX7PeMzeU9gCV6sbnmEScs"
9.    # the salt to use in passbolts CakePHP, see
      https://api.wordpress.org/secret-key/1.1/salt/ (and use one of the
      keys/salts)
10.   passbolt_salt: "SGx.ngspO-d#WFqobx<>Dy^g9zX+aj$Yz4FMt+pbWYl}`?
      zBPj|DiHf$,iFTlG08"
11.   # the name of your default user, admin should be fine
12.   passbolt_default_user: "admin"
13.   # the email of your default user
14.   passbolt_default_user_mail: "admin@neuroforge.de"
15.   # the email for your email notifications (other settings are set up
      for gmail)
16.   passbolt_email_from: "your-email@gmail.com"
17.   # the email password
18.   passbolt_email_password: "<your-email-password>"
Furthermore, in the file inventories/passbolt/hosts.yml, the correct IP address needs to be entered for the variable ansible_host. In the current state of the repository, it is still set to a test IP:
all:
  children:
    nginx:
      hosts:
        passbolt_server:
          ansible_host: 95.217.11.108
          host_ip: "{{ ansible_host }}"
          certbot_base_domains_singular:
            - name: "{{ infrastructure_base_domain }}"

          certbot_domains_singular:
            - name: "{{ passbolt_domain }}"

          certbot_base_domains: "{{ certbot_base_domains_singular }}"
          certbot_domains: "{{ certbot_domains_singular }}"
    passbolt:
      hosts:
        passbolt_server:
          ansible_host: 95.217.11.108
          host_ip: "{{ ansible_host }}"
    mariadb:
      hosts:
        passbolt_server:
          ansible_host: 95.217.11.108
          host_ip: "{{ ansible_host }}"
Deployment of the servers
To deploy the server with the above-configured settings, all that's left is to run the Ansible scripts. Simply navigate to the main directory of the scripts and execute the following command:
ansible-playbook -i inventories/passbolt_sever/hosts.yml full_setup.ymlAfter executing this script, the following has happened:
Python has been installed (for Ansible). The UFW firewall has been installed and configured.
MariaDB database server has been installed and configured with the Passbolt database.
Passbolt has been installed and configured as a Docker container.
Nginx has been installed and configured as a reverse proxy for Passbolt, including Let's Encrypt SSL certificate.
Now, the server should be accessible via the previously configured domain using HTTPS.

Initial user configuration and login/setup of the plug-in
To perform the initial user configuration, a direct connection to the Passbolt Docker on the newly provisioned server is required. The repository provides the small Bash script "passbolt_shell.sh" for this purpose. To access the server using it, you start it with the following command:
bash passbolt_shell.sh<your-server-ip>To create the first admin user, you now execute the following command (adjusted with the desired settings) in the Passbolt container shell:
su -c "./bin/cake passbolt register_user -u admin@yourorg.com -f Admin -l Adminson -r admin" -s /bin/bash www-dataIf everything went correctly, you will see the following output:
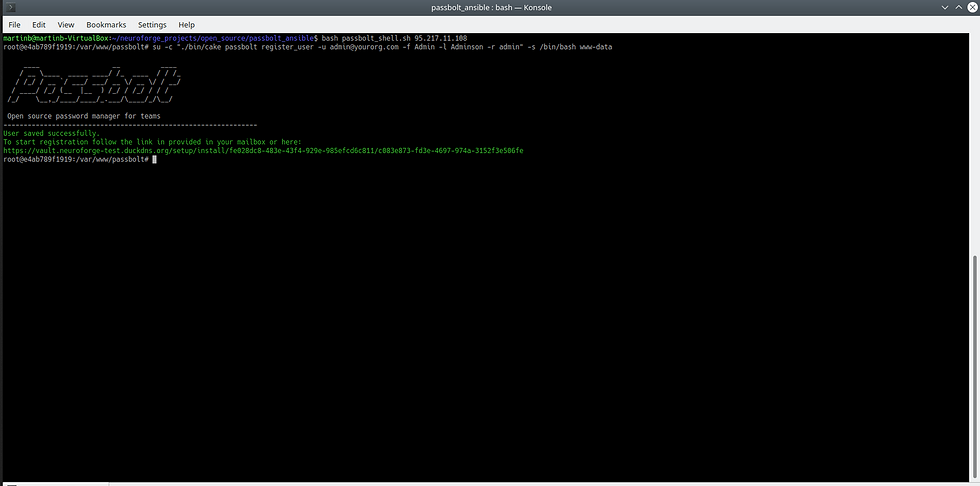
With the URL displayed here, you can now register in your preferred browser (in which you have not installed the Passbolt plugin, have not further configured it, and have not visited the passbolt.com website - otherwise, the plugin will not recognize the URL). After entering the link into your browser of choice (Chrome, Chromium, or Firefox), the following page will be displayed:

Here, you follow the link to the extension in the respective extension store and install the plugin. Once the plugin is installed, you refresh the page, and you will see the following page:

If everything fits, tick the box and click on Next and you will be taken to this page:

After you have filled in all the relevant information, click on Next again and you will be taken to the page where you can set your passphrase for your GPG key:

After you have set a passphrase, click on Next again. A key is now generated which can be downloaded from the following page:

You should save this key in a safe place, as you will need it to log in from other devices. Once you have saved it in a safe place, click Next again.

Here, you select a security token that helps prevent phishing. This token (the text and color) will be displayed when logging into Passbolt, allowing you to verify the server's identity. Once you are satisfied, click on "Next" and you are ready to log in.

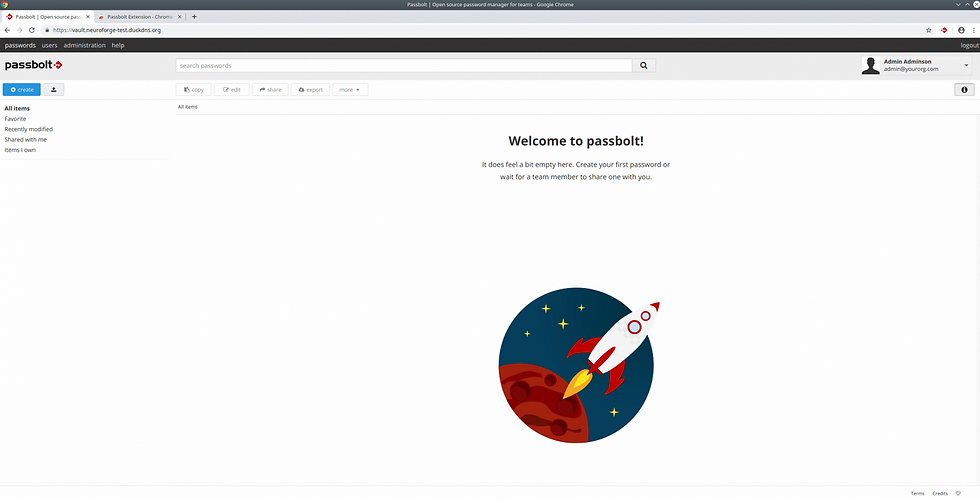
After a successful login, you are greeted by the Passbolt main page:
Finally, you can make sure that everything has gone correctly by going to the Healthchecks page at https://your-passbolt.domain.org/healthcheck:

Saving of the server
Of course, it is also important to consider the backup of the database on the server. It is a good idea to regularly create dumps of the MySQL database on the server and back them up along with the directories mounted from the Passbolt container (which also includes the server's PGP key). For this purpose, the passbolt_ansible repository provides the script "manual_backup.sh":
1.    #!/bin/bash
2.    old_pwd=$(pwd)
3.    DATE=`date +"%m-%d-%y"`
4.    BASE_DIR=passbolt_backup_$1_$DATE
5.    mkdir -p $BASE_DIR
6.    cd $BASE_DIR
7.    ssh -t -i "${old_pwd}/ssh_keys/root_rsa" root@$1 mysqldump --all-
      databases > "mariadb-$1-$DATE.sql"
8.    mkdir -p all_ansible_data_backup
9.    scp -i "${old_pwd}/ssh_keys/root_rsa" -r root@$1:/data/ansible
      all_ansible_data_backup
A simple call from
bash manual_backup.sh<your-ip>is enough, and a backup of the entire MariaDB database (all tables, not just Passbolt) as well as all Passbolt files to be backed up was created in the folder passbolt_backup_<your-ip>_<date>. However, this backup mechanism is only a minimal version of a backup system which should be extended as soon as possible by an automatic backup (regular database dumps which are then transferred from the Passbolt server to an SFTP server, e.g. via cronjob and rdiff-backup, together with the rest of the data).
Conclusion
In this article, we saw how easy it is to set up a modern password manager yourself. With the help of the scripts provided on GitHub, the complete infrastructure of a Passbolt instance can be self-hosted and updated in less than an hour, securely and maintainably.
If you have any further questions on this topic, you can of course contact us at any time either on GitHub or directly.
Notes
*Although the Ansible scripts should also work on servers that have already been set up, it should be mentioned here that NeuroForge GmbH & Co. KG does not assume any liability for the scripts - especially in view of the fact that the Ansible scripts do not contain any special checks to check whether software is already installed or otherwise configured.